The day is not long when everyone will have their own assistant on the tip of their fingerprint. For Cortana, Siri and Android Assistant it’s just a start. Can you think when virtual assistant idea got picked up ? If no then we have answer for you.
Robot word is also derived from scene from Karel Čapek’s 1920 play. Like that virtual assistant idea is also inspired from some movie and game scenes. Every one is aware of HALO game series. In that game there is an one character named as “CORTANA”. She is there as an AI Assistant. I am pretty sure that Microsoft named there assistant “CORTANA” from that background. And another scenario is from Marvel movies. Iron man movie also has an fully blown assistant named as J.A.R.V.I.S.. He can do all things.
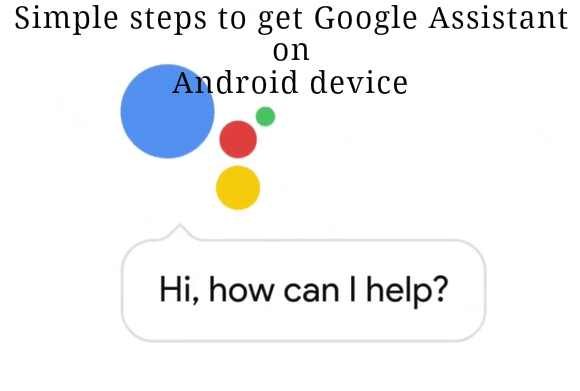
From above two scenario virtual assistant concept got pick up. And now three major companies have released there virtual assistant for the user. Here, we are going to discuss about Google powered virtual assistant named as Google Assistant.
Eagerness about new features and trends in technology makes us to use it as soon as it releases. That’s make you tech geek.
In May 2016 google published Android 7.0 preview. In that preview google introduced us to their virtual assistant. Everyone is waiting to get hands on that assistant. As Google Assistant is only available to new Pixel devices. It is not possible to everyone to buy Pixel device for Google Assistant. To use that feature it require some modification in system to get that feature. Today, we are going to give you a simple method. So that you can use google assistant on your android device which is running on android marshmallow and higher versions.
There are three easy methods which can be used to get Google Assistant on android device which is running on Nougat:
Method 1:
Requirements: Things required to do for Google Assistant.
- Root Permission Required. Root any Android Device in simple steps.
- BuildProp Editor application. Download it from Play Store.
- Updated Google Search Application on device.
Procedure:
- Download and install the above BuildProp Editor application on your android device from play store.
- Open that application and grant root access to that app.
- After granting root access. Open the app and click on the edit option shown on upper right bar.
- After clicking it on you can see Text editor on the screen.
- As google assistant is only available to Pixel devices. Build property of device needed to change. Replace the exciting code in the text editor with new code. And click on save.
- Then add the following code in that text editor and save it.
- Now, reboot the device and after rebooting you can see that by holding home button Google Assistant gets displayed.
…
Method 2:
Don’t want to mess with codes. Getting confused then follow the following step to get Google Assistant on android device.
Requirement:
There are different applications on Play Store which helps to enable Google Assistant on android phone. Those application requires root access. So, that they can make change in build property.
- Google Assistant Enabler App.
- Root Access.
- Latest Google Application.
Procedure:
- Install the Google Assistant Enabler app like Get Assistant from Play Store.
- After installing this application. Open the application and follow the onscreen procedure.
- This procedure will lead you to the activation of Google Assistant on android device running on marshmallow and Nougat.
- Enjoy Google Assistant by holding home button on your smartphone.
…
Method 3:
Another method to enable Google Assistant is flashing. For some Nougat running android devices developers has released some script which can be used to modify system. These modifications allow user to use Google Assistant by holding home button. Those script needed to flash on your android device. This method doesn’t require root access.
Requirement:- Custom Recovery Access
- Unlocked Boot-loader device.
- .zip file which contains build.prop script.
- Latest Google Application.
Note: Every device has different .zip file. You can find out it on device developer forum.
Procedure:
- Download the respected .zip file from developer forum like XDA, etc.
- Boot device into recovery mode.
- Select the install option and choose respected zip file.
- After flashing it clear the Dalvik cache from the recovery.
- Click on reboot system option. It will take some time to boot up device.
- Hold the middle home button and enjoy Google Assistant on your android device.
Didn’t got an Android 7 update but still want to use Google Assistant. Then here is a way to enable Google Assistant on Marshmallow device.
How to get Google Assistant on android device which is running on marshmallow?
Requirement:
- You must familiar with Xposed Framework. Know about Xposed Framework and how to use it.
- Root Access.
- Xposed Framework Application.
Note: Get complete knowledge of Xposed if you don’t know about it. Improper handling can brick your device.
- Android N-ify application which is an Xposed Module.
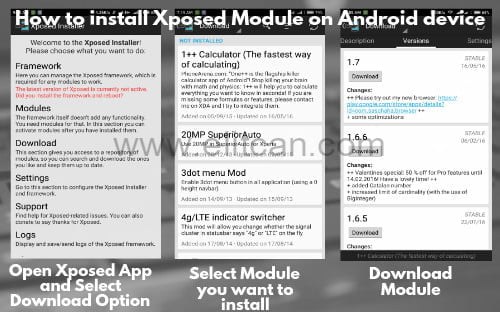
Procedure:
- Download and install Xposed and N-ify Application.
- Enable the N-ify module from Xposed framework application.
- Follow the screen command and activate the Google Assistant from N-ify application.
From above all methods you can get Google Assistant on android device running on Marshmallow and Nougat.
Enjoy the pixel features on your android device and use Google Assistant to increase your productivity.