Category: Uncategorized

  • Guide Magisk a system-less root

    Guide Magisk a system-less root

    We all know about rooting and its benefits. As a developer sometime it is difficult to imagine Android without root. There are different ways to root android device. Those methods directly deals with the system files to get root access. By changing those system files, root access can be achieved. Today, i am going to tell you about the new method of rooting beyond the system and SU binaries. Name of that method is Magisk a system-less root. Is that convenient to use Magisk a system-less root? Will it harm your device ? What are the benefits of Magisk ? and most important question Why custom ROM makers using it in their ROM as default root access way?

    In Android operating system, to strengthen the security of the smartphone OEM gives a lot of functionality in the smartphone. Functionality like locking of bootloader, restriction to the root directory makes smartphone more secure. It protects smartphone from being attacked by the third-party malware and virus. But, as to enjoy the limitless functionality of the android it needs to root. With root access user can tweak the android system. This affects the security of the smartphone which leads to threat to our privacy. Smartphone manufactures are trying to get rid of such things by locking the bootloader and by giving the monthly security patch to the system.

    Magisk a system-less root

    But as android evolving day-by-day rooting is also getting evolved.

    As the evolution of technology started human being started to getting being addicted with it. We wanted all the facilities on our hands. Facilities such as multimedia, gaming, photography needs less security than compared with facilities like banking, Office works, mail, purchasing and facilities which directly deals with the privacy of the user. From last few years with each new update of android version Google giving security patches to the user. This security patches matter a lot while dealing with the security of the smartphone. As rooting harms the security of the smartphone. Developers are come up with new solution to that threat. One of the XDA developer topjohnwu has developed the binaries and software which will help us to root smartphone without touching the system files and security. This method is nothing but Magisk a system-less root. Why it is called as system-less root ? Any guess.

    About Magisk a system-less root:

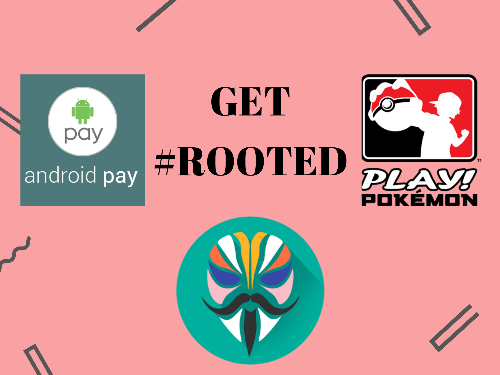
    Magisk Root is now going neck to neck with SuperSu. Because, it is better than SuperSu in various aspects. Various ROM developers like Lineage OS, Resurrection Remix and others are now including Magisk in their official ROMs. Main reason behind it is that with Magisk you can hide root access. Example of a Pokemon Go and banking applications. If android smartphone is rooted with SuperSu and if you install a Pokemon Go or banking app. Then it will close automatically with a warning. Such application can not run on a rooted device. This is the key reason why ROM makers preferring Magisk over SuperSu in android system. If you are SuperSu user then you get only one option and that is unroot your android phone or don’t use such applications.

    Magisk is the answer to you root need.

    Why it is special ? Why it is called as a system-less interference ?

    Reason behind success of Magisk is that it does not touch any of your system files. It means that it does not make any changes in System Partition. No need to include any binaries in the system file to get root access. Our conventional method of rooting is to change system partition and add some files in system to obtain root access. This all things make android system untouched. This is the reason Magisk is called as a system-less root solution.

    Why to use Magisk?

    • User can run any application on his device like Pokemon Go which can not be used on rooted smartphone.
    • Run Banking Apps.
    • Install OTA updates.
    • Support to incremental OTA updates.
    • Install System-less Xposed.
    • Bypass Android Pay.
      Great..!!
  • How To Get Google Assistant On Any Android Phone

    How To Get Google Assistant On Any Android Phone


    get google assistant on android device
    Get Google Assistant on your android device

    The day is not long when everyone will have their own assistant on the tip of their fingerprint. For Cortana, Siri and Android Assistant it’s just a start. Can you think when virtual assistant idea got picked up ? If no then we have answer for you.

    Robot word is also derived from scene from Karel Čapek’s 1920 play. Like that virtual assistant idea is also inspired from some movie and game scenes. Every one is aware of HALO game series. In that game there is an one character named as “CORTANA”. She is there as an AI Assistant. I am pretty sure that Microsoft named there assistant “CORTANA” from that background. And another scenario is from Marvel movies. Iron man movie also has an fully blown assistant named as J.A.R.V.I.S.. He can do all things.

    From above two scenario virtual assistant concept got pick up. And now three major companies have released there virtual assistant for the user. Here, we are going to discuss about Google powered virtual assistant named as Google Assistant.


    Eagerness about new features and trends in technology makes us to use it as soon as it releases. That’s make you tech geek.


    In May 2016 google published Android 7.0 preview. In that preview google introduced us to their virtual assistant. Everyone is waiting to get hands on that assistant. As Google Assistant is only available to new Pixel devices. It is not possible to everyone to buy Pixel device for Google Assistant. To use that feature it require some modification in system to get that feature. Today, we are going to give you a simple method. So that you can use google assistant on your android device which is running on android marshmallow and higher versions.

    There are three easy methods which can be used to get Google Assistant on android device which is running on Nougat:


    Method 1:

    Requirements: Things required to do for Google Assistant.

    Procedure:

        1. Download and install the above BuildProp Editor application on your android device from play store.
        2. Open that application and grant root access to that app.
        3. After granting root access. Open the app and click on the edit option shown on upper right bar.
        4. After clicking it on you can see Text editor on the screen.
        5. As google assistant is only available to Pixel devices. Build property of device needed to change. Replace the exciting code in the text editor with new code. And click on save.
        6. Then add the following code in that text editor and save it.
        7. Now, reboot the device and after rebooting you can see that by holding home button Google Assistant gets displayed.


           Method 2:

          Don’t want to mess with codes. Getting confused then follow the following step to get Google Assistant on android device.

          Requirement: 

          There are different applications on Play Store which helps to enable Google Assistant on android phone. Those application requires root access. So, that they can make change in build property.

          Procedure:

            1. Install the Google Assistant Enabler app like Get Assistant from Play Store.
            2. After installing this application. Open the application and follow the onscreen procedure.
            3. This procedure will lead you to the activation of Google Assistant on android device running on marshmallow and Nougat.
            4. Enjoy Google Assistant by holding home button on your smartphone.


          Method 3:

          Another method to enable Google Assistant is flashing. For some Nougat running android devices developers has released some script which can be used to modify system. These modifications allow user to use Google Assistant by holding home button. Those script needed to flash on your android device. This method doesn’t require root access.
          Requirement:

          • Custom Recovery Access
          • Unlocked Boot-loader device.
          • .zip file which contains build.prop script.
          • Latest Google Application.
            Note: Every device has different .zip file. You can find out it on device developer forum.

          Procedure:

          1. Download the respected .zip file from developer forum like XDA, etc.
          2. Boot device into recovery mode.
          3. Select the install option and choose respected zip file.
          4. After flashing it clear the Dalvik cache from the recovery.
          5. Click on reboot system option. It will take some time to boot up device.
          6. Hold the middle home button and enjoy Google Assistant on your android device.


          Didn’t got an Android 7 update but still want to use Google Assistant. Then here is a way to enable Google Assistant on Marshmallow device.

          How to get Google Assistant on android device which is running on marshmallow?

          Requirement:

          Procedure:

          1. Download and install Xposed and N-ify Application.
          2. Enable the N-ify module from Xposed framework application.
          3. Follow the screen command and activate the Google Assistant from N-ify application.

          From above all methods you can get Google Assistant on android device running on Marshmallow and Nougat.
          Enjoy the pixel features on your android device and use Google Assistant to increase your productivity.

  • Guide What is Brick and Why Android gets Bricked

    Guide What is Brick and Why Android gets Bricked

    What does it mean when Android gets Bricked?
    Define Bricked Android Tablet.

    What means BRICK to you? Brick means simply a rectangular block made of a clay. Block which never responds to any action. This state is called as a Bricked state. This saying is used largely in technology world. Brick word is used to refer a electronics device when it stops working properly. In that post, We are going to answer you all the questions about bricking of phone, tablet, etc. After reading that you will be able to understand Why Android gets bricked? What to do if you have a bricked device, and How you can avoid bricking of android phone and tablet?

    meaning of bricked android device
    Why Android Phone, Tablet gets Bricked?

    In android, Bricking is a condition. Condition of a device when device didn’t works properly. Many times Android phone, tablet, etc. never responds. They takes long time to respond. In that case, Many people refer their device by different name like useless piece of stone, block, etc., etc. If you are wondering Why android phone, tablets are compared to brick then you will get answer here. There is strong possibility that BRICK word has come in Android dictionary from day-to-day examples like above.

    Bricking refers to a Electronic Device which has stopped working. Because of damaged firmware or hardware.

    It happens because of corrupted firmware or damaged hardware present in the device.

    When Android Phone or Tablet can’t function properly or it fails to power ON. Then, it is called as a Bricked Device.

    Types of Bricking in android phones 2016:

    According to the device’s ability to function bricked devices are classified in two types.

    1. Hard Brick
      What is Hard Brick means?
      Many times Android phone, tablets fails to power up properly. Then it is called as a Hard Bricked device. In that case device never shows any vendor logo while booting.
    2. Soft Brick
      What is Soft Brick means for beginners?
      When Software error makes device unusable then Android phone, tablet is called as a Soft Bricked. Soft Bricked device shows problems like Boot loop or freezing of device during boot.

    Why Bricking of android device can’t be fix easily?

    There are some reasons behind it. We are not able to fix bricked android device so easily. Android devices are not like as Computers. Bricked Computers are easy to fix as compared to android device. Because, after bricking on computer you can install another operating system. But, It is not same for Android phones and tablets. You can’t install another operating system on mobile phones so easily as like as Computer. That’s why fixing bricked android device is complicated.


    Why android devices get bricked?

    How to identify your android gets bricked?

    There are many reasons which leads android phones and tablets in a bricked condition. To avoid these condition users must know about potential reasons behind it. Top general reasons for any soft bricked android smartphone.

    • When user tries to Overwrite Device’s Firmware:
      While overwriting or flashing newer or older version of firmware on the android phones and tablets there is lot of possibility of bricking the device.
      Never install firmware which is not supported to your device.
    • Avoid installation of low-level and unsupported system software on your device.
    • Due to some physical conditions like power failure.
      While updating firmware if device loses power then there is chance of failure in system. It happens because of half-overwritten system files. And half-overwritten firmware can not function properly on device. This may lead your device in bricked state.
    • Avoid virus and malware in the system. Virus and malware has a potential to damage system files. It can brick android phones and tablets.
    • Don’t interrupt device while updating firmware procedure is ongoing. Interruption can corrupt firmware data. This may lead to device into bricked state.