In last thread, we talked about Magisk a System-less root. Today, we are going to talk about different ways to install Magisk Manager and Root Android Phone & tablet. One of the cleanest ways to install Magisk Manager is by using TWRP Recovery. When we flash new root binaries on the android device, old root binaries need to be removed. It helps to avoid malfunctioning and hard bricking of android phone. Flashing files on android device using TWRP recovery makes sure to replace the old binaries with the new one. That’s why flashing through recovery like TWRP always preferred to install Magisk Manager.
Follow following steps to Install Magisk Manager and Root Android Phone & tablet:
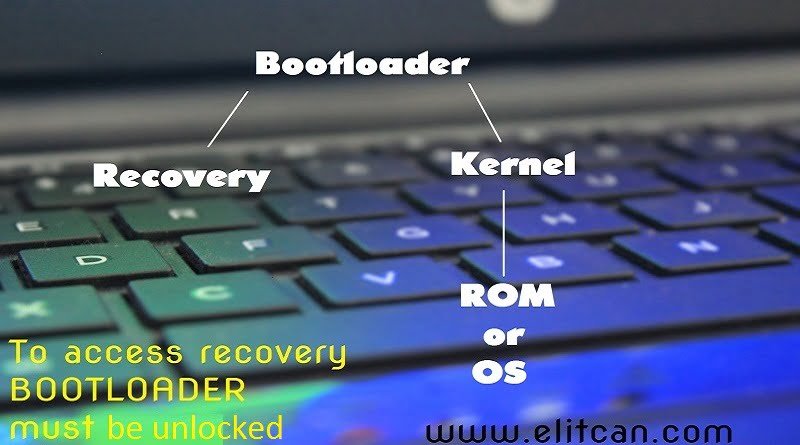
STEP 1: Unlock bootloader of Android device
Unlocking bootloader is one of the basic step required before experimenting with your android smartphone. It’s like unlocking the door of multiple possibilities. See this thread to know more about What is exactly Android Bootloader? and How to unlock Bootloader of any Android device?
STEP 2: Install Custom Recovery like TWRP.
After unlocking the bootloader of Android device, we need to flash the custom recovery on the device. Learn more about Android recovery: What is Android Recovery? The custom recovery like TWRP helps to flash .zip files as well as binary files on the android partition.
Follow the following steps to install TWRP recovery on the android device:
- First Unlock bootloader of the android device on which you want to install TWRP recovery.
- Put your phone into Fastboot Mode or in Bootloader mode. (varies from device to device)
- Download the ADB files of your Android device.
- After downloading ADB files, open ADB shell using command prompt on Windows OS or Terminal on MAC OS. Remember to open the command window in a location where you placed ADB files.
%22%20transform%3D%22translate(1.4%201.4)%20scale(2.71875)%22%20fill-opacity%3D%22.5%22%3E%3Cellipse%20fill%3D%22%23fff%22%20rx%3D%221%22%20ry%3D%221%22%20transform%3D%22rotate(87.9%2052.9%20121.8)%20scale(39.21196%20191.96691)%22%2F%3E%3Cellipse%20fill%3D%22%23d0d0d0%22%20cx%3D%22121%22%20cy%3D%2219%22%20rx%3D%2242%22%20ry%3D%2252%22%2F%3E%3Cellipse%20fill%3D%22%23d4d4d4%22%20cx%3D%22134%22%20cy%3D%22128%22%20rx%3D%22255%22%20ry%3D%2226%22%2F%3E%3Cellipse%20fill%3D%22%23fff%22%20cx%3D%22208%22%20cy%3D%2264%22%20rx%3D%2261%22%20ry%3D%2240%22%2F%3E%3C%2Fg%3E%3C%2Fsvg%3E)
- Download Official TWRP Recovery for your Android device.
- Use the following command to flash the .img file of TWRP recovery.
- fastboot flash recovery <recovery file name>.img

Detail guide flash TWRP on your Android Device.
STEP 3: Download the Magisk Manager ZIP file
After completing the installation of TWRP, next step is to download supported Magisk ZIP file. This ZIP file will install the Magisk Framework on your phone. This framework will give your device a systemless root functionality. Get Magisk Manager for your Android device from here.
We strongly recommend you to always use only supported files to root your android device.
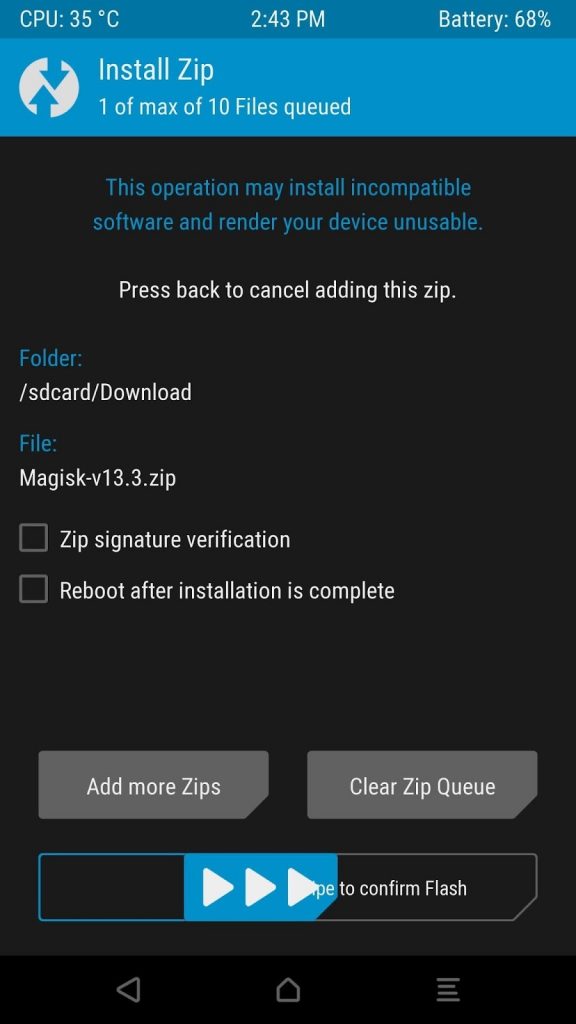
STEP 4: Flash Magisk ZIP in TWRP
Reboot your Android device into TWRP recovery mode. Then TAP the install button from the main menu. Navigate to the folder where Magisk ZIP is downloaded. Select that ZIP file and just swipe the slider at bottom of the screen to install Magisk. After completion of installation just hit button Reboot.
STEP 5: Install Magisk Manager APK
After successful installation of the Magisk framework, we need to install the Magisk Manager application which will access that framework. This application is no longer available on Play Store. so, to install it you need to enable “Unknown Sources” from setting menu. Download Latest Magisk Manager application and install it.
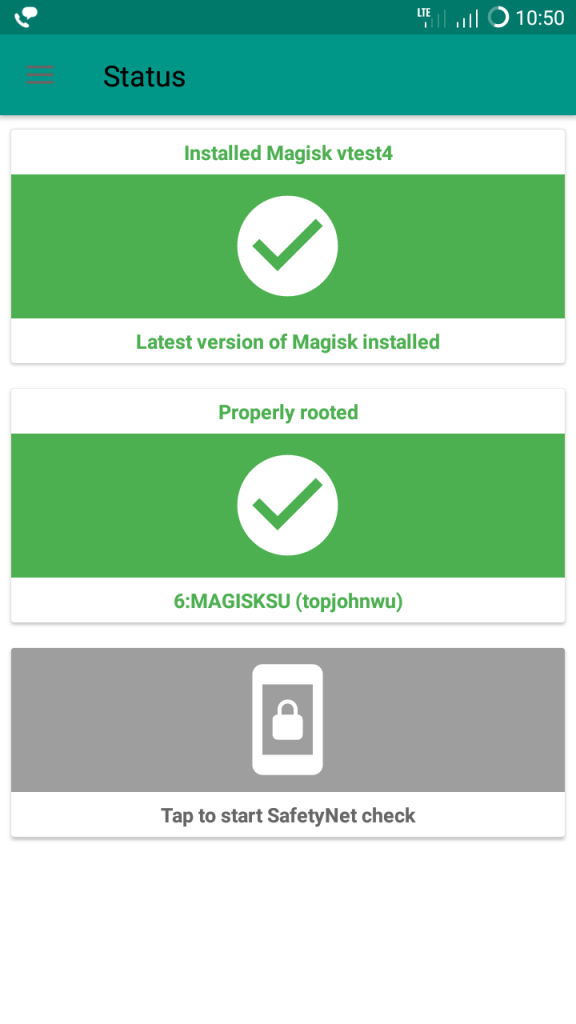
STEP 6: Verify Root and SafetyNet status
Open Magisk Manager app. Now, you can see a message towards the top of the screen that says “MAGISKSU (topjohnwu)” with a green checkmark next to it. That shows your phone is now rooted. If your seeing red mark on it then follow above steps properly.
This way you can install Magisk Manager and Root Android Phone & Tablet. For Magisk Modules stay tuned to elitcan.com and stay updated.