Author: Saurabh Patil

  • How to Use Android As A Remote Control For TV, PC, Set Top Box, PowerPoint, Projector

    How to Use Android As A Remote Control For TV, PC, Set Top Box, PowerPoint, Projector

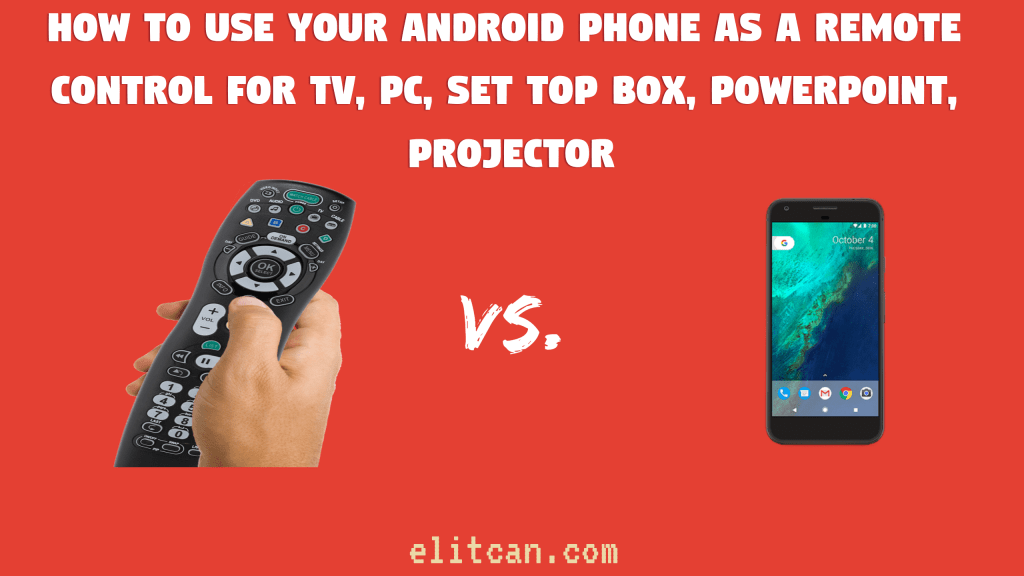
    Use Android as a remote to Control any TV, PC, Set Top Box, and Projector from Android Phone

    Have you watched Iron Man 2? One of the finest movies Marvel has ever made isn’t it? Today I want to notice your attention towards one of the scenes where sanator Stern and government officials who hate Tony Stark wanted Military to have Tony Stark’s armor so that they can be powerful unlike anything! See it yourself below:

    https://www.youtube.com/watch?v=X5ge0pd7hMQ


    Most interesting part of the scene was to watch RDJ aka Tony Stark hacking, controlling TV Screen from his phone. In this era inspite of having technologies like AR, VR, we use traditional devices like TV, Projectors. So, Can You Control TV, Projectors, AC, Set Top Box, etc. devices from your Android Mobile Phone? How android as a remote works? What does it require to control the TV from your android mobile?

    Use Android as a remote
    How To Use Your Android Phone As A Remote Control For TV, PC, Set Top Box, PowerPoint, Projector

    How Android Remote Control Works (TV, AC, DTH, etc.)?

    First, we need to understand the working of a remote. In a remote, IR (Infrared) blaster device is attached. Data is sent over the infrared rays to other device which is to be controlled.

    When we press a button on remote a specific pulse of infrared light gets transmitted. And on another side, receiver decodes that pattern of signal and responds to that instructions. This way remote control works.

    Android IR Blaster

    Let’s see How To Control PC, TV, AC, SetTop Box, etc. With Android Mobile Phone IR Blaster? You can check List of mobile devices with IR Blaster. Use Builtin IR Blaster or Buy New one which fits in your headphone port.

    Now, let’s take an example, Xiaomi’s smartphone comes up with MI Remote application. In that application, major all appliances are listed out. After completing self explanatory first time setup, You can control any electrical appliances with just one click. Like that there are plenty of applications available on Google Play Store. Those applications help us to control the electrical appliances. You just need a smartphone with IR Blaster. 

    Advantage of IR Blaster

    1. It doesn’t require Internet.
    2. It is easy to use.
    3. Anyone from child to super adult can use it.
    4. Compatible with most of the appliances.

    Disadvantage of IR Blaster

    1. You can only do operations like turning on the TV, controlling Volume and channel, etc.
    2. You can not operate PC from it.
    3. Sometimes it doesn’t work. Because of external interruption of its frequency.

    Android Remote Over WiFi

    The second way to operate appliances like PC from Android is by using network connectivity. There are multiple methods to do it. You can use the applications like Team Viewer, Microsoft Remote Control or others. It will help you to manage, operate and control the PC. It is more effective because it gives you end to end native support.

    This way we can control electrical appliances from android phone. Doesn’t matter where you can use it. It can be Samsung/Sony/LG TV or projector connected in your classroom too. So, let’s Use Android Phone to Control Other Devices like TV, AC, Projector, Set Top Box, DTH, Blue Ray, DVD, PC, PowerPoint, etc. Did we miss anything? Let us know in the comments section below.

  • How To Flash Zip File From PC: Desktop Flasher

    How To Flash Zip File From PC: Desktop Flasher

    A man who never experienced flashing process in his android lifetime then he is missing beauty of android. From beginner android developer to experienced developer flashing is an essential process. No one can bypass flashing stage in android. It is mandatory to everyone nothing matters what purpose it is. It can be a root thing, custom ROM or hardcore android development. You can’t avoid flashing. Many time while installing or flashing any files on android system user needed to transfer that file from computer to an internal or external SD card. Today, we are giving you a simple way to flash zip files from PC to Android.

    Easy stuff…!! But Size matters…!!

    For example, Most of the custom ROMs like Cyanogen, Resurrection Remix, PAC-Man, AOSP,etc. comes up with average size of 500 MB. Then it is not a big problem. Sometimes OEM like MIUI gives system update of  1 GB or more than it. Then it gets irritated to transfer those files from computer to external storage. In such situation question arise Can we flash .zip files directly from computer? Is there any a simple way to flash zip files from PC to Android?

    Here is the answer for your question How to flash .zip file from a computer?
    This method saves time of flashing Custom MODs, kernels, gapps and ROMs. To use this method device must come up with some requirement such as custom recovery must be installed on your device. Learn how to flash custom recovery on android device.

    Old Method to flash .zip files:

    1. Install custom recovery on android device.
    2. Move files needed to flash on internal or external SD card.
    3. Then files can be flash on android device.
      This method consumes lot of time and it requires lot of free memory on internal or external SD card to process further.

    New Method:
    Today we are coming with a new method to flash .zip files. In this method, Desktop Flasher application is used. It is a small application which allows user to flash .zip files from computer to android device.

    Note: Now directly flash all your zip files from desktop to Android device on one click. Just needed to download and install the Desktop Flasher on PC which is running on windows operating system.

    Download Desktop Flasher.

    Thanks to elit filmaker
    Things to do before using that application:

    1. Install the latest USB drivers of device on PC.
    2. Enable USB debugging mode on device.

    How to use Desktop Flasher:

    desktop flasher app to flash file

    1. Open
    2. Download .zip file which you want to install
      way to flash zip files
    3. Drag and drop .zip file on the application to flash it on android device
    4. It will prompt to open custom recoveries like CWM or TWRP on device
    5. After confirmation it will start the flash process

    Just some clicks and your .zip file is flashed. Best way to flash zip files from PC to Android.

  • How To Fix iPhone 6, 7, 8, X and iOS 11 Instagram Crash, Freezing Issue?

    How To Fix iPhone 6, 7, 8, X and iOS 11 Instagram Crash, Freezing Issue?

    Fix Instagram crashing, freezing, force stopping issue on iPhone 6/6s, iPhone 7/7 Plus, iPhone 8/8Plus and on iPhone X

    Memories, one of the precious gift of a human being. It is one of the important things in our life which plays a big role. It allows us to remember specific moment occurred in the past. Some of them are easy to remember while some we can’t. We can not remember those memories longer. In such cases, photography has given one of the media to a human being so we can store our memories. It is desirable and easy to share with other people. In childhood days we used to maintain album of such photos. Now, with the help of photo-sharing services like Instagram, Snapchat we can share and maintain our photographs so easily. And if you got good camera phone like iPhone 7/8 or iPhone X then its well and good. But from last week many users of iPhone are facing Instagram freezing issues. so, What is causing glitch of iPhone X/ 8/ 7/ 6/ other iPhone Versions?

    How to fix iPhone 6, 7, 8, X and iOS 11 Instagram freezing issue?

    Why is Instagram crashing on iPhone 7/8 and on iPhone X?

    Apple has launched three major devices iPhone X, iPhone 8 and iPhone 8 Plus in October 2017. Those devices come up with the bionic chip.

    Apple also claimed that bionic chipset has made iPhone 8 and iPhone X fastest mobiles on the planet right now.

    With such great speed and power if you facing Instagram crashing issues on iPhone then it is a big concern. But the reason lies in the software of iPhone devices. After the launch of iPhone 8 and X, Apple started rolling out iOS 11 updates to the new and existing devices. A large number of people started facing such issues after updating their iPhones. Compatibility of Instagram application with iPhone’s updated software was so buggy. Because of this Instagram is crashing on iPhone devices.

    How to fix the Instagram freezing issues on iPhone 7, iPhone 8 and iPhone X?

    Before going to following steps try to RESTART your iPhone 7, iPhone 8 or iPhone X. And check that is your problem is now solved or not. If your problem was solved then avoid following methods. If you are still facing trouble with Instagram then try Instagram on Mobile Data as well as on Wi-Fi. It is recommended because iOS deals with different networks differently.

    Oops…!! Still facing the same issue? Don’t worry follow the simple method mentioned below:

    Update! Updating current application with new one helps the user to fix common bugs present in it. From App Store, we can update our existing application. Check that your Instagram Application is updated or if not then update it. Or try to reinstall Instagram on your device. It will solve your problems like quick freezing and crashing Instagram application on iOS-powered devices.

    How to reinstall Instagram application on iPhone 6, iPhone 7, iPhone 8 and iPhone x?

    1. Go to Home screen.
    2. Tap and hold the Instagram app icon until it vibrates and shakes.
    3. Tap x on the app to remove it.
    4. After uninstalling, navigate to the App Store and click on install Instagram button.
    5. Done. Now, you can enjoy Instagram application on your Apple devices.

    This way we can use Instagram on iPhone 6/7/8/X without any lag and issue. Post your photos captured from iPhone on Instagram with hast tag #iamelit. Try more than one Instagram account on one phone.

  • How to Turn Off Windows 10 Background Data?

    How to Turn Off Windows 10 Background Data?

    1. Turn Off, Restrict, Disable, Block, Stop Windows XP/ 7/ 8/ 8.1/ 10 Background Data

    Yesterday while working for ElitCan, suddenly my 2GB high-speed data of Jio ended unexpectedly within a few minutes. I was really shocked since I was only browsing Wikipedia and Facebook. Mostly images and text content. How can those sites eat my 2GB data within minutes? So, I decided to investigate where my data is lost. From the settings menu, I found that in background windows update was downloaded. This Windows 10 Background Data Consumption eaten all of my data. You might have a similar experience before. Hence, today, I am going to tell you How to Block Background Data on Windows PC.

    How to Stop Windows XP/ 7/ 8/ 8.1/ 10 Background Data?
    How to Stop Windows XP/ 7/ 8/ 8.1/ 10 Background Data?


    What’s Consuming Windows 10 Background Data, Internet Bandwidth?

    Like Android, Windows also has a large user base. Since Windows 10 is going to be Microsoft’s last Windows update, it has come with a lot of updates, features and even built-in antivirus: Windows Defender. With all those good things, come to a lot of bugs! To fix those bugs, issues, problems, security vulnerabilities, updates are most necessary! And Windows 10 automatically starts its update service causing Windows 10 Eating Up Internet.


    By default Windows operating system sets data connection to non-metered. Which doesn’t restricts background data activity on windows desktop, laptops or on tablets.

    But most of the time our internet service provider provides us with a limited amount of internet data. so in such case, we need to set internet connection on limited mode. so that data can be used only on user’s demand. Which helps to restrict the background data activity on windows 10. This way by setting network connection to metered can help us to block the background data usage.

    Steps to Stop Windows XP/ 7/ 8/ 8.1/ 10 Background Data?

    1. Open the Settings menu on the Windows Operating System.
    2. Click on Network & Internet Option.
    3. If you are using Wi-Fi connectivity, click on Wi-Fi. Otherwise, select Ethernet or Dial-Up option.
    4. Click on the Network you are connected.
    5. After clicking on it there will be an option of Metered Connection. Activate that option.
    6. Done.

    Turn Off, Block, Restrict, Disable, Stop Windows 10 Background Data

    This way in simple steps we can Turn Off Windows 10 Background Data. Now, all the background data activity will not run until and unless the user runs it.


  • Guide Magisk a system-less root

    Guide Magisk a system-less root

    We all know about rooting and its benefits. As a developer sometime it is difficult to imagine Android without root. There are different ways to root android device. Those methods directly deals with the system files to get root access. By changing those system files, root access can be achieved. Today, i am going to tell you about the new method of rooting beyond the system and SU binaries. Name of that method is Magisk a system-less root. Is that convenient to use Magisk a system-less root? Will it harm your device ? What are the benefits of Magisk ? and most important question Why custom ROM makers using it in their ROM as default root access way?

    In Android operating system, to strengthen the security of the smartphone OEM gives a lot of functionality in the smartphone. Functionality like locking of bootloader, restriction to the root directory makes smartphone more secure. It protects smartphone from being attacked by the third-party malware and virus. But, as to enjoy the limitless functionality of the android it needs to root. With root access user can tweak the android system. This affects the security of the smartphone which leads to threat to our privacy. Smartphone manufactures are trying to get rid of such things by locking the bootloader and by giving the monthly security patch to the system.

    Magisk a system-less root

    But as android evolving day-by-day rooting is also getting evolved.

    As the evolution of technology started human being started to getting being addicted with it. We wanted all the facilities on our hands. Facilities such as multimedia, gaming, photography needs less security than compared with facilities like banking, Office works, mail, purchasing and facilities which directly deals with the privacy of the user. From last few years with each new update of android version Google giving security patches to the user. This security patches matter a lot while dealing with the security of the smartphone. As rooting harms the security of the smartphone. Developers are come up with new solution to that threat. One of the XDA developer topjohnwu has developed the binaries and software which will help us to root smartphone without touching the system files and security. This method is nothing but Magisk a system-less root. Why it is called as system-less root ? Any guess.

    About Magisk a system-less root:

    Magisk Root is now going neck to neck with SuperSu. Because, it is better than SuperSu in various aspects. Various ROM developers like Lineage OS, Resurrection Remix and others are now including Magisk in their official ROMs. Main reason behind it is that with Magisk you can hide root access. Example of a Pokemon Go and banking applications. If android smartphone is rooted with SuperSu and if you install a Pokemon Go or banking app. Then it will close automatically with a warning. Such application can not run on a rooted device. This is the key reason why ROM makers preferring Magisk over SuperSu in android system. If you are SuperSu user then you get only one option and that is unroot your android phone or don’t use such applications.

    Magisk is the answer to you root need.

    Why it is special ? Why it is called as a system-less interference ?

    Reason behind success of Magisk is that it does not touch any of your system files. It means that it does not make any changes in System Partition. No need to include any binaries in the system file to get root access. Our conventional method of rooting is to change system partition and add some files in system to obtain root access. This all things make android system untouched. This is the reason Magisk is called as a system-less root solution.

    Why to use Magisk?

    • User can run any application on his device like Pokemon Go which can not be used on rooted smartphone.
    • Run Banking Apps.
    • Install OTA updates.
    • Support to incremental OTA updates.
    • Install System-less Xposed.
    • Bypass Android Pay.
      Great..!!
  • How To Get Google Assistant On Any Android Phone

    How To Get Google Assistant On Any Android Phone


    get google assistant on android device
    Get Google Assistant on your android device

    The day is not long when everyone will have their own assistant on the tip of their fingerprint. For Cortana, Siri and Android Assistant it’s just a start. Can you think when virtual assistant idea got picked up ? If no then we have answer for you.

    Robot word is also derived from scene from Karel Čapek’s 1920 play. Like that virtual assistant idea is also inspired from some movie and game scenes. Every one is aware of HALO game series. In that game there is an one character named as “CORTANA”. She is there as an AI Assistant. I am pretty sure that Microsoft named there assistant “CORTANA” from that background. And another scenario is from Marvel movies. Iron man movie also has an fully blown assistant named as J.A.R.V.I.S.. He can do all things.

    From above two scenario virtual assistant concept got pick up. And now three major companies have released there virtual assistant for the user. Here, we are going to discuss about Google powered virtual assistant named as Google Assistant.


    Eagerness about new features and trends in technology makes us to use it as soon as it releases. That’s make you tech geek.


    In May 2016 google published Android 7.0 preview. In that preview google introduced us to their virtual assistant. Everyone is waiting to get hands on that assistant. As Google Assistant is only available to new Pixel devices. It is not possible to everyone to buy Pixel device for Google Assistant. To use that feature it require some modification in system to get that feature. Today, we are going to give you a simple method. So that you can use google assistant on your android device which is running on android marshmallow and higher versions.

    There are three easy methods which can be used to get Google Assistant on android device which is running on Nougat:


    Method 1:

    Requirements: Things required to do for Google Assistant.

    Procedure:

        1. Download and install the above BuildProp Editor application on your android device from play store.
        2. Open that application and grant root access to that app.
        3. After granting root access. Open the app and click on the edit option shown on upper right bar.
        4. After clicking it on you can see Text editor on the screen.
        5. As google assistant is only available to Pixel devices. Build property of device needed to change. Replace the exciting code in the text editor with new code. And click on save.
        6. Then add the following code in that text editor and save it.
        7. Now, reboot the device and after rebooting you can see that by holding home button Google Assistant gets displayed.


           Method 2:

          Don’t want to mess with codes. Getting confused then follow the following step to get Google Assistant on android device.

          Requirement: 

          There are different applications on Play Store which helps to enable Google Assistant on android phone. Those application requires root access. So, that they can make change in build property.

          Procedure:

            1. Install the Google Assistant Enabler app like Get Assistant from Play Store.
            2. After installing this application. Open the application and follow the onscreen procedure.
            3. This procedure will lead you to the activation of Google Assistant on android device running on marshmallow and Nougat.
            4. Enjoy Google Assistant by holding home button on your smartphone.


          Method 3:

          Another method to enable Google Assistant is flashing. For some Nougat running android devices developers has released some script which can be used to modify system. These modifications allow user to use Google Assistant by holding home button. Those script needed to flash on your android device. This method doesn’t require root access.
          Requirement:

          • Custom Recovery Access
          • Unlocked Boot-loader device.
          • .zip file which contains build.prop script.
          • Latest Google Application.
            Note: Every device has different .zip file. You can find out it on device developer forum.

          Procedure:

          1. Download the respected .zip file from developer forum like XDA, etc.
          2. Boot device into recovery mode.
          3. Select the install option and choose respected zip file.
          4. After flashing it clear the Dalvik cache from the recovery.
          5. Click on reboot system option. It will take some time to boot up device.
          6. Hold the middle home button and enjoy Google Assistant on your android device.


          Didn’t got an Android 7 update but still want to use Google Assistant. Then here is a way to enable Google Assistant on Marshmallow device.

          How to get Google Assistant on android device which is running on marshmallow?

          Requirement:

          Procedure:

          1. Download and install Xposed and N-ify Application.
          2. Enable the N-ify module from Xposed framework application.
          3. Follow the screen command and activate the Google Assistant from N-ify application.

          From above all methods you can get Google Assistant on android device running on Marshmallow and Nougat.
          Enjoy the pixel features on your android device and use Google Assistant to increase your productivity.

  • Tools needed to build Custom ROM for Android

    Tools needed to build Custom ROM for Android

    Android ROM development Tools Introduction

    If you search ‘build android ROM‘ then, number of results shown up. Is this so easy to build ROM for Android device? It depends on number of modifications you wanted to do. But, believe me. Without proper knowledge you can’t build perfect ROM for Android device. You must know all the things require to build Custom ROM for android device. From basic to advance, this shows how matured you are in Android development.

    Human beings are using tools from medieval era. From the ancient times tools are referred as a physical item. Due to advancement in human life, definition of tool is changed. Tool is an item which helps human for completion of work or to achieve goals. For completion of every work we require tool. Our hands, brain, body parts are also great tools which helps us to complete our goal and work. Same philosophy is followed in Software and Hardware industry. Now tools are not only limited as a physical item. Software required to develop different things are also categorized as a tool. For example, to create movie we require software like Movie Maker. Those software are nothing but a tool.

    In this guide, I am going to introduce you to different tools required to build Custom ROM for Android.

    Essential tools required to build Custom ROM for android:

    • JAVA JDK(Java SE Development Kit)
      Java is the essential part of the Android Operating System. For proper android development you must learn Java. It will help you to understand android development properly. Your Computer must know commands of java libraries. You can install those SE binaries by using JAVA JDK kit.
      Download Java JDK.
      openjdk
      Why we needed to install Java while developing app or ROM for android?
      For Android development system require multiple java applications to run. This java application requires JDK Kit to run. That’s why JDK Kit must be installed on your PC.
    • CYGWIN
      Android is Linux based Operating system. It is important to develop android from Linux based operating system. But if you want to work from Microsoft’s Windows Operating system then you need third-party software like Cygwin. It helps user to build Unix-like environment on Windows Operating System. It provides 
      native integration of Windows-based system resources with data of the Unix-like environment. It provides user functionality similar to a Linux on Windows OS.
      Download CYGWIN
    • META-INF
      META-INF needed to make flashable zip files. Using it you can club different meta and APK files in a single .zip file. Using META-INF you can flash .zip file from recovery mode.
    • Android Kitchen
      Android Kitchen software helps to build Custom ROM for android devices. With the help of Android Kitchen you can port different ROM for different android devices. You can customize the ROM according to your need.
      Download Android Kitchen UOT Kitchen or ROM Kitchen.
      Household-Kitchen-icon
      You can also try different Kitchen to cook different types of ROMs.

      Download Notepad++ and Android device drivers.

    • Notepad ++
      It is source code editor software. It supports different languages. Recommended for Windows users.
      Notepad_Plus_Plus_Logo
    • Device Drivers
      Install drivers of the device on your system. It helps system to interact with the device.
    • ADB Driver
      Install ADB driver on your system.
      ADB known as Android Debug Bridge is a command-line utility included with Google’s Android SDK. It helps system to control your device over USB.
     These is the introduction to some of the essential tools required to start developing Custom ROMs for Android devices.
  • SuperSU for Android instant Review with features

    SuperSU for Android instant Review with features

    What is SuperSU for Android?

    In last two guides, we discussed about Root. You can learn more about root from there. What To Do After Rooting Android Phones 2016 and Android Rooting For Beginners?. In this post we are going towards another app review. App which i am going to told you is most important app for rooted users. You can’t imagine rooted phone without SuperSU for Android application. Today, I am going to told you about “SuperSU”.

    SuperSU for Android

    Why SuperSU for Android is so important?

    After rooting your android device you must use that root permission so wisely. It can damage your phone too. So, It is important to manage the applications who are using Root access. There are lot of applications who can break device’s security using root access. It can harm your Android device. It can brick your device. So, How to prevent rooted device from bricking? We require something which can manage those root permission. Fortunately, there is one application which helps user to control Root permission. Thanks to Chainfire Developers. This app is called as ‘SuperSU’.

    SuperSU application helps user to control root permissions. When any application wants root permission then SuperSu application shows pop-up notification about it. You can grant or deny root permissions to respected application. SuperSU app monitors all applications who are using root privileges. With the help of SuperSU you can anytime grant or deny root permissions. Most important feature of this application is that it is free for everyone. And it has active community which always works on it to make it better and better everyday. Don’t worry about root permissions install SuperSU for Android device right now.


    Features of SuperSU:

    • It keeps track of applications which has granted root permissions.
    • When you run SuperSU for next time it helps user to automatically grant those permissions again.
    • Keeps complete log of applications which granted root permission.
    • You can monitor how frequently those applications use root permissions.
    • SuperSU can temporarily unroot your device.
    • Helps to troubleshoot issues if your phone is stuck in boot loops.
    • Also works in recovery mode.
    • You can also lock SuperSU application using PIN code. This requires you to buy pro version of application. It will cost you nearly $3.
    • OTA survival mode.
    • Full color-coded command content logging. Different colors for input/output/error.
    • Per-app logging configuration
    • Per-app user override
    • Per-app notification configuration
    • Deep process detection
    • Works when Android isn’t properly booted
    • Works in Ghost Mode
    • Convert to /system app
    • Complete unroot
    • Support to CyanogenMod ROMs
    • Personalization options:
      • Icon can be changed including invisible option
      • Different Themes

    Review of SuperSU:

    There is no doubt about usefulness of SuperSU. Is it really worth? In straight word yeah it is worth to use SuperSU application on rooted device. User interference of application is simple and easy to understand. Most important thing is you can download and install it without any cost. It is free for all. If you want some extra features then i suggest you to go for PRO version of SuperSU. Download link is given below. Grant or Delay function is quiet easy. In addition with permission control, SuperSU also keeps an extensive log of all root permissions. You can also remove root functions temporarily on one click. PRO version helps device to quickly re-rooted after an OTA (Over-The-Air) update. Overall SuperSU for Android is great application.

    Download SuperSU free version

    Download SuperSU PRO

    Developer Chainfire

  • Custom Rom Paranoid for Android Review

    Custom Rom Paranoid for Android Review

    ANDROID ROM PARANOID REVIEW

    There are lot of Custom ROMs available in the market. Recently, we talked about CyanogenMod. Its features, supported devices list and How to install CyanogenMod quickly on any Android device?. In this review, I am going to tell you about some interesting thing about one more Custom ROM of Android- ‘PARANOID’. Paranoid for Android is an open-source ROM based on Android OS. It is available for Android smartphones and Tablets. In 2015, Paul Henschel started working on new OS which is based on Android. Later, this Operating System was ranked second by lot of Technology Publisher. This Operating System is now recognized as a Paranoid.

    paranoid for android

    Exciting Features of Android Custom ROM Paranoid 2016:

    Paranoid brings new life in Android device. Its not just a ROM which contains lot of features. Paranoid Android ROM comes up with fun filling features like App Pie, Hover Control,etc. It helps user to enjoy exciting features with fun. It helps to improve the user experience. Paranoid is also famous for its stability. It maintains the stability of the system. This makes Paranoid for Android one of the best AOSP ROMs available today.


    One of the most exciting thing about Paranoid is that it is the only ROM which go straight with a stable release.

    Some of the top most features of Paranoid for Android are as follows:

    • Floating Mode:
      It helps user to view application without opening it. Example, Replying message with quick reply.
    • OTS Control:
      On-The-Spot feature helps to open quick setting easily from Notification Window.
    • Hover Control
    • Immersive Mode
    • App Pie
    • Peek Feature
    • Dynamic Status Bar
    • Quick Setting:
      Add/Remove different tiles where you wanted.
    • CyanogenMod Theme Engine Support
    • System-wide Immersive Mode:
      Using this feature you can hide or appear notification bar and navigation bar.
    • Advanced Power Menu
    • Exciting Battery Styles
    • Advanced Power Dialogue
    • Support of Paranoid Updates

    paranoidmodify app

    Which Android powered device support Official Paranoid Installation?

    List of Paranoid ROM supported devices.

    • Nexus 6P
    • Nexus 5X
    • Nexus 7 (2013)
    • Nexus 9
    • Nexus 5
    • Nexus 6
    • Nexus 7 (2012)
    • Galaxy Nexus
    • Nexus 4
    • Nexus 10
    • Oneplus One
    • Oneplus Two
    • Oneplus Three
    • Oneplus X
    • Xperia Z3
    • Xperia Z3 Compact
    • Xperia Z3 Tab Compact
    • Xperia Z2
    • Xperia Z2 Tab LTE/WIFI
    • Pixel C
    • Oppo Find5
    • Oppo Find 7a
    • Oppo Find 7s
    • Oppo N1


    Paranoid is best choice for the users who wanted to use Android as a daily driver. It gives you direct stable update. There is no confusion about alpha, beta and stable builds. Just one build and it is perfect for you. Latest Marshmallow build of Paranoid is best ever build ever released. I suggest you to use Paranoid for Android if you want to use all Custom ROM features on daily driver build.


    Know about Paranoid from there Developers.